


Your car’s alternator is like the unsung hero of your vehicle’s electrical system, silently keeping everything running smoothly. But what happens when it starts to fail?
Strange noises, dimming lights, or a dead battery might signal trouble. This isn’t just an inconvenience—it’s a potential breakdown waiting to happen. Imagine being stranded on the side of the road, or worse, in a deserted parking lot at night.
Scary, right? But you can avoid this nightmare by learning how to test your car’s alternator. It’s easier than you think, and with a little guidance, you’ll feel empowered to tackle this yourself. Why leave your car’s health to chance when you can take control? Stick around, and we’ll guide you step-by-step through this simple process. By the end, you’ll not only have peace of mind but also gain a deeper understanding of how your car works. Ready to become a more confident car owner? Let’s get started!

Credit: www.familyhandyman.com
Signs Of A Failing Alternator
Recognizing alternator issues early prevents bigger problems. A car’s alternator keeps the battery charged. It powers electrical systems. When failing, it shows clear signs. Being aware helps in timely repairs. Here are key indicators of a faulty alternator.
Dimming Lights
Notice headlights dimming at night? This might indicate alternator trouble. Interior lights may also flicker. The alternator’s job is to maintain power. If it struggles, lights dim. This is often one of the first signs.
Battery Warning Light
The battery warning light is a crucial alert. It often signals charging issues. A failing alternator can’t charge the battery well. This light may flicker or stay on. Pay attention if it does. It’s a clear indication of a problem.
Electrical Failures
Watch for strange electrical issues. Power windows might move slowly. Radio may cut out unexpectedly. These symptoms point to alternator failure. It can’t support the car’s electrical demands. Such failures often worsen over time.
Credit: www.youtube.com
Preparation For Alternator Testing
Testing a car alternator is essential for vehicle maintenance. Proper preparation ensures accurate results and safety. Before diving into testing, make sure you have all tools ready. Also, prioritize safety to prevent accidents. This section will guide you through the necessary steps for a smooth testing process.
Gather Necessary Tools
Start by collecting essential tools for alternator testing. A multimeter is crucial for measuring voltage and current. Have a wrench set handy for loosening and tightening bolts. You will also need safety gloves to protect your hands. Ensure a flashlight is available for better visibility. Lastly, a service manual specific to your car model will be helpful.
Safety Precautions
Safety should be your top priority. Wear safety goggles to protect your eyes from sparks. Always disconnect the battery before testing. This prevents electrical shocks or short circuits. Make sure the car is on a flat surface. Engage the parking brake to avoid movement. Ensure proper ventilation in the area to reduce fume inhalation.
Initial Visual Inspection
Before diving into technical tests, start with a visual inspection. This helps spot obvious issues. It saves time and avoids unnecessary steps. Begin by checking the alternator belt and wiring connections. These are crucial components. Problems here can affect the alternator’s performance.
Check Alternator Belt
Inspect the alternator belt for wear and tear. A worn-out belt may slip or break. This leads to charging problems. Look for cracks, fraying, or glazing. These signs indicate the belt needs replacing. Ensure the belt is tight and properly aligned. A loose belt won’t spin the alternator effectively.
Inspect Wiring Connections
Examine the wiring connections around the alternator. Loose or corroded wires can disrupt power flow. Check for signs of corrosion or damage. Look for broken or frayed wires. Secure any loose connections. Ensure all wires are tightly connected. This ensures smooth electrical transmission.
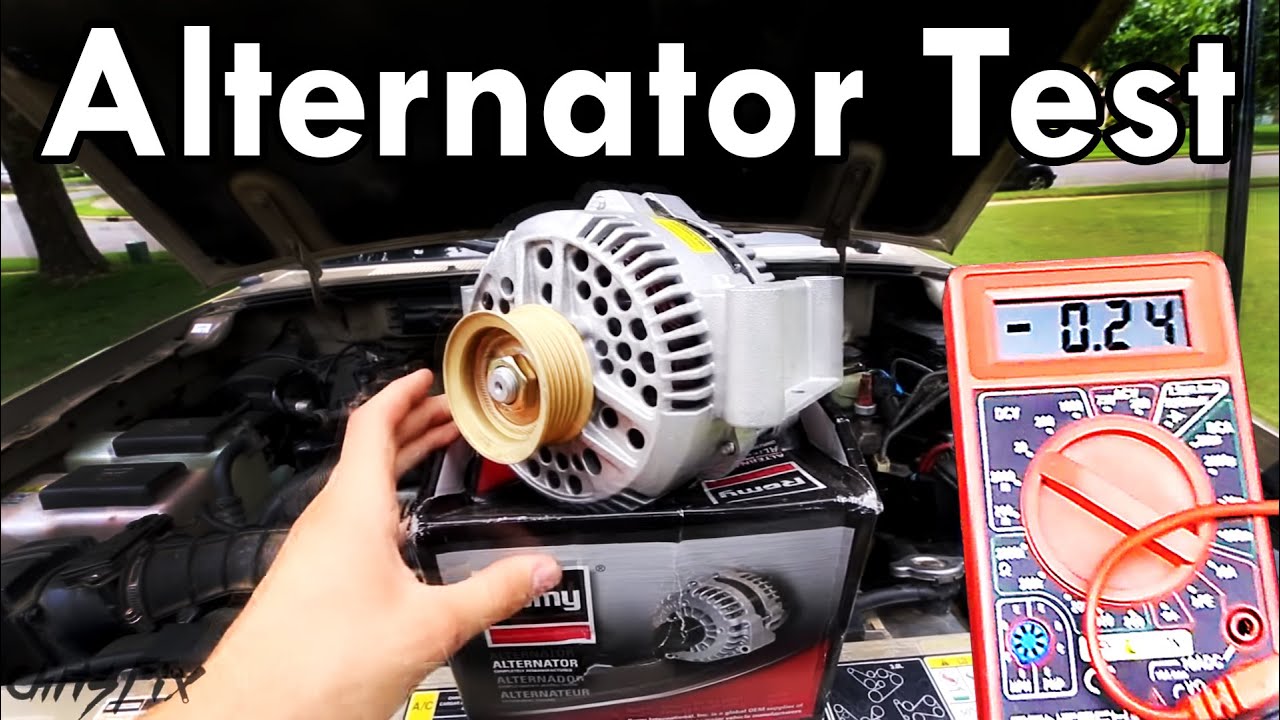
Testing With A Multimeter
Testing the alternator in a car involves using a multimeter to check voltage output. Ensure the multimeter is set to DC voltage and connect probes to the battery terminals. A healthy alternator typically shows a reading between 13. 8 to 14.
5 volts, indicating proper function.
Testing the alternator with a multimeter is a straightforward process. It helps diagnose electrical issues in your car. A multimeter measures voltage, ensuring your alternator works well. Follow these steps to efficiently test your alternator using a multimeter.
Setting Up The Multimeter
First, set your multimeter to DC voltage. Choose the 20 volts setting. This range suits most car electrical systems. Connect the black probe to the negative battery terminal. Attach the red probe to the positive terminal. This setup prepares the multimeter for accurate readings.
Voltage Testing Procedure
Start your car and let it idle. Check the multimeter display. A healthy alternator should show a reading between 13.8 to 14.8 volts. If the reading is below 13 volts, the alternator may be failing. Turn on electrical components like headlights and radio. Observe the voltage. It should remain stable.
Interpreting Results
Readings over 15 volts indicate overcharging. This can damage the battery. A reading under 13 volts shows undercharging. This leads to a drained battery. If the voltage stays steady between 13.8 and 14.8 volts, the alternator is functioning well. For any abnormal readings, consider professional help.
Using An Alternator Tester
Testing your car’s alternator can seem daunting, but using an alternator tester simplifies the process significantly. This handy tool provides an easy way to assess the health of your alternator without requiring an advanced degree in mechanics. Imagine the peace of mind knowing you’re not stranded with a dead battery. Let’s dive into how you can effectively utilize an alternator tester to ensure your vehicle’s electrical system is in top shape.
Understanding Tester Functions
An alternator tester is like your car’s health monitor. It reads essential data about your alternator’s performance. Before you start, familiarize yourself with its functions. Most testers will check voltage output, current flow, and even identify diode issues. Think of it as a multi-tool for your alternator’s diagnostics.
Knowing these functions helps you interpret the readings accurately. A good tester can tell you if your alternator is charging correctly or if there’s a need for replacement. Take a moment to understand what each button and light on your tester indicates. This knowledge is crucial for a smooth testing process.
Step-by-step Testing Process
Begin by switching off your engine and ensuring your car is in park. Safety first—never forget that. Connect the tester to the alternator according to the manufacturer’s instructions. This often involves linking the tester’s leads to the alternator and battery terminals.
Once connected, start your engine. Pay attention to the tester readings. You’re looking for a voltage between 13.5 and 14.5 volts. Anything outside this range could indicate an issue. If your alternator is underperforming, it’s time to consider a repair or replacement.
Don’t be afraid to ask questions if the readings confuse you. Is your alternator charging efficiently? Is there a risk of battery failure in the near future? The alternator tester provides immediate insights, helping you decide on the next steps for your vehicle’s care.
Testing your alternator doesn’t have to be a complex task. With an alternator tester, you can quickly assess its performance and make informed decisions. Next time you hit the road, do so with confidence, knowing your car’s electrical system is reliable.
Common Issues And Solutions
Testing the alternator is crucial for car maintenance. It ensures the alternator works correctly. Sometimes, problems arise that need quick solutions. Understanding these issues helps you fix them efficiently. Below are common alternator problems and their solutions.
Loose Connections
Loose connections can cause the alternator to fail. Check the connections at the battery and alternator. Ensure they are tight and secure. A loose connection might prevent the alternator from charging the battery. Use a wrench to tighten any loose connections. This simple step often resolves the problem.
Faulty Voltage Regulator
The voltage regulator controls the alternator’s output. A faulty regulator can cause overcharging or undercharging. This affects battery performance. Test the regulator with a multimeter. Check if the voltage is within the recommended range. If not, consider replacing the regulator. It ensures the alternator functions correctly.
Worn-out Bearings
Bearings help the alternator spin smoothly. Worn-out bearings produce a grinding noise. This noise indicates a problem. Check the alternator for unusual sounds. Replacing worn bearings is essential. It prevents further damage and extends alternator life.
When To Consult A Professional
Testing an alternator can often be simple. Yet, some situations demand expert help. Knowing when to consult a professional is crucial. It ensures safety and prevents damage to your vehicle. This section highlights scenarios requiring professional intervention.
Complex Electrical Problems
Car electrical systems can be tricky. They involve many components. If you face complex electrical issues, seek a professional. A trained mechanic can diagnose intricate problems. They have the tools and knowledge needed. This reduces the risk of further complications.
Persistent Alternator Issues
Has your alternator been causing repeated issues? This might indicate a deeper problem. Persistent problems can be hard to fix alone. A professional can identify hidden faults. They offer solutions tailored to your car’s needs. Consulting them saves time and effort.
Frequently Asked Questions
How Do You Test If The Alternator Is Bad?
To test if the alternator is bad, use a multimeter. Check the voltage output at the battery. It should read between 13. 8 and 14. 4 volts with the engine running. If the voltage is low, the alternator might be faulty.
Consider professional inspection for accurate diagnosis.
Can I Test My Alternator Without Removing It?
Yes, you can test your alternator without removing it. Use a multimeter to check voltage output. Connect it to the battery terminals while the engine is running. Ensure the voltage is between 13. 8 and 14. 8 volts. This indicates your alternator is functioning properly.
Which Battery Cable Do You Take Off To Test The Alternator?
Remove the negative battery cable to test the alternator. This helps check if the alternator is charging properly. Ensure the vehicle is running before disconnecting to avoid electrical damage. Always use safety precautions while performing this test to prevent any harm or damage.
Can Autozone Test An Alternator Off The Car?
AutoZone cannot test an alternator off the car. They require the alternator to be installed for testing. Visit a mechanic for off-car testing.
Conclusion
Testing your car’s alternator is crucial for vehicle health. Follow the steps carefully. Ensure your car battery is in good shape first. Use a multimeter for accurate readings. Check the voltage output. Look for signs of alternator failure. Strange noises or dim lights can be indicators.
Regular testing can prevent unexpected breakdowns. This keeps your car running smoothly. Safe driving depends on a reliable alternator. Don’t ignore small issues; they can grow larger. A healthy alternator means a happy car. Keep it checked and stay worry-free on the road.