


When your car’s battery keeps dying or your headlights start dimming, you might wonder what’s going on under the hood. It could be your alternator causing the trouble.
You’re not alone—many drivers face this issue, and the good news is that checking your alternator doesn’t require a mechanic. Imagine feeling empowered, knowing you can diagnose one of the most vital parts of your car on your own. In this guide, you’ll learn the simple steps to check your car’s alternator, helping you save time and money while ensuring your vehicle runs smoothly.
By the end, you’ll not only understand the process but feel confident in handling it. Let’s dive in and unveil the mystery behind your car’s power source.
Signs Of A Failing Alternator
Understanding the signs of a failing alternator is crucial. The alternator keeps your car’s battery charged. It powers electrical systems while the engine runs. If it starts failing, various car functions suffer. Identifying these signs early can prevent bigger issues. Below are some common indicators of a failing alternator.
Dashboard Warning Lights
A clear sign is the dashboard warning light. Often, it’s a battery-shaped icon. Some cars have a “GEN” or “ALT” light. This warns of alternator problems. Ignoring it could lead to a dead battery.
Dimming Headlights
Dimming headlights signal a weak alternator. The alternator can’t supply enough power. This causes headlights to flicker or dim. It’s most noticeable at night. Proper lighting is essential for safe driving.
Electrical Issues
Electrical problems can indicate alternator failure. Power windows may operate slowly. The radio might not work. Even air conditioning can lose strength. These happen because the alternator isn’t providing enough power.

Credit: www.familyhandyman.com
Tools Needed For Testing
Testing your car’s alternator requires some essential tools. Knowing what you need simplifies the process. Each tool serves a specific purpose in checking the alternator’s health. With the right tools, you can efficiently diagnose potential issues.
Multimeter
A multimeter is vital for testing electrical systems. It measures voltage, current, and resistance. This tool helps determine if the alternator is charging correctly. Set it to measure voltage for accurate readings. Ensure the battery is fully charged before testing.
Wrench Set
A wrench set is necessary for removing components. You might need to loosen bolts or nuts. Ensure you have the right sizes for your car model. A good set includes various sizes. This enables you to work on different parts without hassle.
Safety Gear
Safety gear protects you while working. Wear gloves to prevent cuts or shocks. Safety glasses shield your eyes from debris. Ensure a well-ventilated area to avoid inhaling fumes. Safety first keeps the process secure and worry-free.
Safety Precautions
Ensure the car is on a flat surface before starting. Disconnect the battery to prevent electric shock. Wear safety gloves and goggles to protect yourself.
Checking the alternator on a car requires attention to safety. Following proper precautions helps avoid accidents. These steps ensure you work safely and effectively. Before starting, make sure you have the right tools.Park On Level Ground
Find a flat surface to park your car. This prevents unwanted movement. A stable position is crucial for safety. Engage the parking brake once parked. Double-check that the car is in gear. This adds an extra layer of security.Disconnect The Battery
Turn off the car’s ignition before handling the battery. Locate the battery terminals under the hood. Use a wrench to loosen the negative terminal. Remove the negative cable and keep it away from the battery. This prevents electrical shocks and shorts.Wear Protective Equipment
Put on gloves to protect your hands from sharp edges. Wear safety goggles to shield your eyes from debris. Protective clothing helps in case of accidental spills. Wearing the right gear minimizes risk during inspection. Prioritize your safety at all times.Credit: www.youtube.com
Step-by-step Alternator Inspection
Easily check your car’s alternator with a step-by-step guide. Start by examining the drive belt for tightness and wear. Next, use a multimeter to test the battery voltage. Confirm proper connections. Listen for unusual noises. Finally, ensure the alternator’s output matches the manufacturer’s specifications.
Inspecting your car’s alternator can feel daunting, but it’s a task you can tackle with a bit of guidance. A step-by-step alternator inspection not only helps you understand your car better but can also save you money on unnecessary repairs. Ever wondered why your battery keeps dying or why those dashboard lights flicker? It might just be your alternator. Let’s dive into a hands-on approach to diagnosing your alternator issues and get your car running smoothly again. ###Visual Inspection
Start by popping the hood and visually examining the alternator. Look for any obvious signs of damage or wear, such as cracks or dents. Is your alternator covered in oil or dirt? These can affect its performance. I once found a family of acorns nestled in mine, causing all sorts of chaos! Check the alternator’s mounting brackets and bolts. Are they loose or missing? Ensure everything is securely fastened. A loose alternator can lead to a noisy ride and reduced efficiency. ###Belt Condition Check
Next, inspect the belt connected to the alternator. A worn-out belt can slip, reducing the alternator’s ability to charge the battery. Feel the belt’s surface. Is it smooth, or are there cracks and frays? Replace it if you notice any damage. A quick swap can prevent future headaches and keep your car running. Does the belt sit properly in its pulley grooves? Misalignment can lead to uneven wear and eventual failure. Correct it to ensure optimal performance. ###Wire And Connection Assessment
Turn your attention to the wires and connections. Faulty wiring can hinder the alternator’s function. Check for any exposed or broken wires. A simple electrical tape fix can temporarily solve minor issues. Inspect the connections for corrosion or rust. Clean them with a wire brush to maintain proper electrical flow. I once ignored a corroded connection, leading to a dead battery in the middle of a road trip. Trust me, you don’t want that! Are the wires tightly connected to the alternator? Loose wires can cause intermittent charging problems. Tighten any that seem loose to ensure a steady charge to your battery. By following these steps, you can perform a thorough alternator inspection. Have you ever faced an unexpected car breakdown? Taking proactive steps like this can help you avoid such situations in the future. Remember, a little time spent now can save a lot of trouble later.Testing Alternator Output
Checking the alternator is crucial for car maintenance. Begin by turning off the engine. Use a multimeter to measure voltage at the battery terminals. A healthy alternator typically shows around 13. 8 to 14. 4 volts. Low readings may indicate issues, suggesting the alternator needs attention or replacement.
Checking your car’s alternator is crucial to ensure it’s charging the battery properly. Testing alternator output is a straightforward task that can save you from unexpected breakdowns. By learning how to measure the alternator’s performance, you can detect issues before they become costly problems. So, let’s dive into the steps you can take to test your alternator output effectively.Using A Multimeter
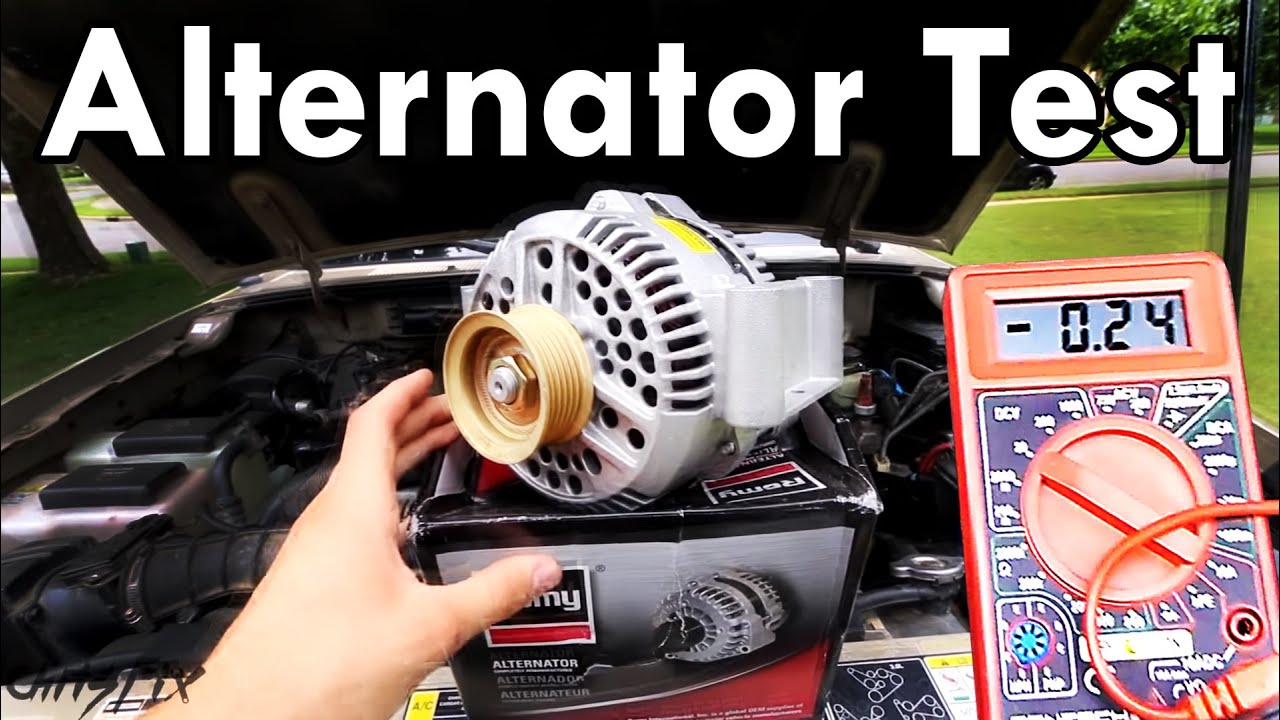
One of the simplest ways to test your alternator is with a multimeter. This handy tool can measure voltage and other electrical parameters. First, make sure your car is off. Connect the multimeter’s positive lead to the positive terminal of your battery. Attach the negative lead to the negative terminal. Turn on the car and set your multimeter to the voltage setting. You should see a reading on the screen. If you don’t have a multimeter, borrowing one from a friend or buying a basic model can be an excellent investment for car maintenance.Voltage Reading Interpretation
Once you have your voltage reading, it’s time to interpret the results. A healthy alternator should produce between 13.5 to 14.5 volts when the engine is running. If your reading falls within this range, your alternator is likely working well. But what if the voltage is too high or too low? If you see a reading above 15 volts, it could indicate an overcharging issue. Conversely, a reading below 13 volts might mean your alternator isn’t charging effectively. These signs should prompt further investigation or consultation with a mechanic.Identifying Voltage Fluctuations
Voltage fluctuations can be a red flag indicating potential alternator problems. While testing, keep an eye on the multimeter reading. If the voltage jumps erratically, this may signal that the alternator is struggling to maintain a stable output. Why does this matter? Consistent voltage is crucial for the smooth operation of your car’s electrical systems. Imagine driving at night and suddenly losing power to your headlights due to an unstable alternator. That’s a situation you definitely want to avoid. You can try revving the engine slightly to see if the voltage stabilizes. If fluctuations persist, it might be time to consider a professional evaluation or replacement. Are you ready to check your alternator and ensure your car runs smoothly? Grab a multimeter and take charge of your car’s health today!Credit: www.autozone.com
Alternator Replacement Options
Checking a car’s alternator involves inspecting connections and listening for unusual noises. Use a multimeter to measure voltage output. Ensure readings are between 13. 8 and 14. 4 volts with the engine running. If inconsistent, consider replacement options to prevent battery issues.
When your car’s alternator starts acting up, it can feel like a daunting task to decide on the next steps. Alternator Replacement Options are plentiful, but finding the right one for your situation is key. Whether you’re a hands-on DIY enthusiast or prefer leaving it to the professionals, you have choices that can fit your comfort level and budget.Diy Replacement
If you love rolling up your sleeves and saving a few bucks, a DIY alternator replacement might be the way to go. It requires some basic mechanical knowledge and the right tools. Start by watching a few tutorials online to understand the process. Make sure your car’s battery is disconnected before beginning. Are you confident with using a wrench and following step-by-step guides? If yes, this could be a satisfying project to tackle on a weekend. You’ll need to source an alternator that matches your vehicle’s specifications. Local auto parts stores or online marketplaces offer a variety of options. Double-check the model compatibility. There’s a certain thrill in fixing your car yourself, and knowing you’ve done it can be a huge confidence booster. But remember, a small mistake can lead to bigger issues.Professional Assistance
If DIY isn’t your thing, professional assistance is a reliable choice. Mechanics have the expertise to replace an alternator quickly and efficiently. This option saves you time and the stress of potential mistakes. Plus, professionals can spot any additional issues during the replacement. Look for a reputable garage with good reviews. A personal anecdote: I once tried to replace a part myself, only to end up at a garage to fix my mistakes, costing me double. Sometimes, paying for expertise is worth it.Choosing The Right Alternator
Choosing the right alternator is crucial, whether you’re doing it yourself or hiring a pro. Ensure the new alternator matches your car’s make, model, and year. Check the amperage rating needed for your vehicle. A higher or lower rating than required can affect performance and longevity. Consider warranty and brand reputation. A good warranty provides peace of mind, and a reputable brand usually means better quality. Have you checked your car’s manual for alternator specifications? It’s a helpful guide that can prevent costly errors. Which option feels right for you? Weigh the convenience of professional help against the satisfaction of a DIY job. Whatever you choose, ensuring you have the correct alternator is the first step toward a smooth ride.Maintenance Tips
Regularly check the car alternator to ensure it charges the battery properly. Listen for unusual noises while the engine runs. Use a multimeter to measure voltage output, ensuring it reads between 13. 8 to 14. 4 volts. Inspect the alternator belt for wear and tightness.
Keeping your car’s alternator in top condition is crucial for a smooth ride. The alternator ensures that your battery remains charged and all electrical systems function correctly. Regular maintenance can prevent unexpected breakdowns and costly repairs. Let’s dive into some essential maintenance tips that can help you keep your alternator running efficiently.Regular Inspections
Regularly checking your alternator can save you from future headaches. Make it a habit to inspect the alternator belt for any signs of wear and tear. A frayed or loose belt can lead to alternator failure. Listening to your car is also key. Unusual noises like squealing can indicate an issue. If you hear strange sounds, it might be time for a professional checkup.Battery Care
Your car’s battery and alternator work hand in hand. Ensure your battery terminals are clean and free from corrosion, as this can affect the alternator’s performance. A simple mix of baking soda and water can help clean off any residue. Consider investing in a battery tester. Testing your battery regularly can provide insights into its health and indirectly reflect on the alternator’s condition. A weak battery can overwork the alternator, leading to premature wear.Alternator Longevity Strategies
Keeping your alternator in good shape involves more than just inspections. Avoid overloading the electrical system with too many devices. Using numerous gadgets simultaneously can strain the alternator. Consider reducing unnecessary electrical load when possible. For instance, switch off the air conditioner and heated seats when they’re not needed. This can help extend the life of your alternator. Have you ever thought about how often you replace your car’s air filter? A clean air filter ensures the engine runs efficiently, which can reduce stress on the alternator. Small maintenance habits like these can make a big difference in the long run. Taking a proactive approach towards your car’s maintenance not only saves you money but also ensures a reliable and stress-free driving experience. What changes can you make today to ensure your alternator stays in great shape?Frequently Asked Questions
How Do You Test If Your Alternator Is Bad?
Test your alternator by starting the engine and disconnecting the battery’s negative terminal. If the engine stalls, the alternator might be faulty. Use a multimeter to check voltage; it should read 13. 8 to 14. 2 volts with the engine running.
This indicates a properly functioning alternator.
Can Autozone Test An Alternator?
Yes, AutoZone can test alternators. They offer free in-store diagnostics to check alternator performance. This helps identify issues affecting your vehicle’s charging system. Visit your nearest AutoZone for assistance.
How To Tell If An Alternator Is Not Charging?
Check for dim headlights or warning lights on the dashboard. Test the battery voltage; it should be 13. 8 to 14. 4 volts when the engine is running. Listen for unusual noises from the alternator. Inspect for loose connections or damaged belts.
How Can You Tell If It’s The Battery Or Alternator?
Check the battery by jump-starting the car. If it starts, the battery may be weak. Test the alternator by removing the battery cable after starting. If the car dies, the alternator might be faulty. Use a multimeter to check voltage; low readings indicate battery issues, high readings suggest alternator problems.
Conclusion
Checking your car’s alternator is crucial. It keeps the battery charged. Without it, your car won’t start. Regular checks prevent breakdowns. Listen for strange noises. Watch for dim lights. Use a multimeter for voltage tests. Follow step-by-step guides for safety.
Seek help if you’re unsure. A healthy alternator means a healthy car. Keep it in top shape. Your car relies on it. Stay proactive. Save time and money. Happy driving!