


Have you ever found yourself stranded with a car that just won’t start? The culprit might be a faulty alternator.
Knowing how to test your car’s alternator can save you from unexpected breakdowns and costly repairs. Imagine the peace of mind you’ll have when you can diagnose the problem yourself, avoiding the hassle of calling a tow truck or waiting for a mechanic.
You’ll discover simple, step-by-step methods to test your alternator, empowering you with the knowledge to keep your vehicle running smoothly. Let’s dive in, so you can get back on the road with confidence!
Signs Of A Failing Alternator
Testing an alternator involves checking for dim lights or frequent battery problems. Listen for unusual sounds from the engine. A burning smell or warning light may also indicate alternator issues.
Is your car showing unusual signs lately? It might be trying to tell you something about its alternator. A failing alternator can cause a range of issues, affecting the overall performance of your vehicle. Knowing the signs can save you from unexpected breakdowns. Let’s explore some symptoms that might indicate your alternator needs attention.Dim Or Flickering Lights
Are your headlights not as bright as they used to be? Dim or flickering lights are often an early indicator of an alternator problem. This happens because the alternator isn’t providing enough power to keep them fully lit. Next time you’re driving at night, pay attention to your dashboard and headlights. If they seem to be struggling, it might be time to check your alternator.Battery Warning Light
The battery warning light on your dashboard is not just about the battery. It often signals an alternator issue. When the alternator can’t keep up with the car’s electrical demands, the light comes on. Don’t ignore it. This warning gives you a chance to address the problem before it escalates.Strange Noises
Unusual sounds coming from under your hood? A failing alternator can produce strange noises like grinding or whining. These sounds occur when internal components like bearings or bushings wear out. If your car is making odd noises, it’s worth investigating further. You might catch a minor issue before it turns into a major repair. Have you experienced any of these signs before? Ignoring them could leave you stranded. Regular checks and maintenance can help ensure your alternator is always in top shape. What steps will you take to keep your car running smoothly?
Credit: www.autozone.com
Tools Required For Testing
Testing an alternator is essential for car maintenance. Ensuring your alternator works efficiently can prevent unexpected breakdowns. Before testing, gather the necessary tools. Having the right tools makes the process straightforward and safe. Let’s explore the tools you need.
Voltmeter Or Multimeter
A voltmeter or multimeter is crucial. It measures the electrical output of the alternator. Choose a digital multimeter for accurate readings. Set the multimeter to DC voltage. Connect it to the car battery. This will help you check the voltage levels. A healthy alternator should show around 13.5 to 14.5 volts. This indicates proper charging.
Safety Gear
Safety gear is important. Protect yourself while working on a car. Wear gloves to avoid shocks. Use safety goggles to shield your eyes. Ensure the car is off before starting. This prevents any accidental injuries. Safety first, always.
Preparing The Car For Testing
Testing an alternator requires careful preparation. Ensuring your car is ready is crucial. This step guarantees accurate results. Proper setup can prevent unnecessary issues during testing. Let’s focus on the essentials to prepare your car.
Parking In A Safe Area
First, find a safe place to park. Choose a flat surface. This prevents the car from moving unexpectedly. Avoid busy streets. They can be dangerous during testing. A quiet driveway or garage is ideal. Safety should be your priority.
Turning Off All Electrical Components
Next, turn off all electrical components. This includes lights, radio, and air conditioning. These can interfere with testing results. Ensure the ignition is off. This conserves battery life. Disconnecting additional devices may be wise. A clear electrical system aids accurate testing.
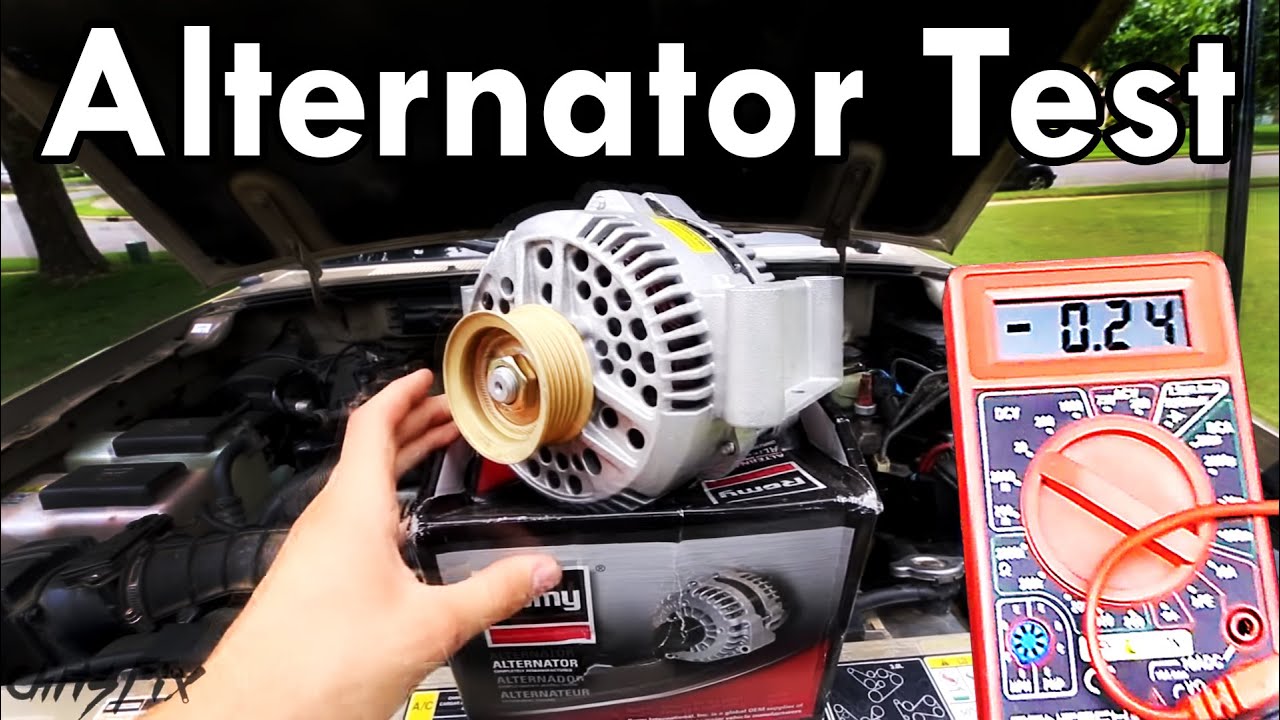
Testing The Alternator Voltage
Testing an alternator voltage involves using a multimeter to check if the car’s battery and alternator are working properly. Start the car and set the multimeter to DC voltage, placing the probes on the battery terminals to ensure voltage falls within the 13.
8 to 15. 3 volts range.
Testing the alternator voltage is a crucial step in ensuring your car’s electrical system is functioning correctly. A faulty alternator can lead to a dead battery or even leave you stranded on the road. By testing the alternator voltage, you can determine if it’s time for a repair or replacement. This process is quite straightforward and doesn’t require advanced mechanical skills. All you need is a voltmeter and a bit of patience.Setting Up The Voltmeter
First, grab your voltmeter. If you don’t own one, they’re available at most auto parts stores. Ensure your car is off before connecting the voltmeter. This will prevent any electrical accidents and give you an accurate reading. Connect the voltmeter’s red lead to the positive terminal of the battery and the black lead to the negative terminal. Make sure the connections are secure for an accurate measurement.Measuring Battery Voltage
Now, turn the car on and let it idle. Keep an eye on the voltmeter. You should see a reading between 13.8 to 14.4 volts. This range indicates your alternator is charging the battery correctly. If the reading is below 13.8 volts, your alternator may not be providing enough charge. Conversely, a reading above 14.4 volts could mean it’s overcharging the battery, which can cause damage over time. Have you ever faced a sudden battery drain? Testing the alternator voltage might reveal the culprit. Taking these measurements doesn’t just save you from unexpected breakdowns. It also gives you peace of mind knowing your car is road-ready. Why not take a few minutes this weekend to check your alternator’s health? It’s a simple yet empowering way to maintain your vehicle.Performing Load Testing
Performing load testing on your car’s alternator is crucial to ensure it’s functioning properly. It’s like checking your heart rate after a workout to see how well your body handles stress. By simulating real-world conditions, you can determine if the alternator is capable of meeting the electrical demands of your vehicle. Remember the time your car’s radio dimmed when you turned on the headlights? That’s a sign your alternator might be struggling. Let’s dive into how you can effectively perform load testing.
Increasing Electrical Load
Start by adding more electrical devices to your car. Turn on the headlights, radio, and air conditioning. You might even consider plugging in a phone charger or turning on the wipers. This simulates the electrical load your car would experience on a typical drive. Have you ever wondered if your alternator can handle all these devices at once? This is how you find out.
Observing Voltage Changes
Next, observe the voltage changes on your multimeter. With the engine running and the devices on, connect the multimeter to the battery terminals. A healthy alternator should maintain a voltage between 13.8 and 14.8 volts, even under load. If you notice the voltage dropping significantly, it’s a sign your alternator might be on its way out. Do you feel confident in your alternator’s ability to keep your devices running smoothly?
By understanding how your alternator responds to increased load and voltage changes, you can prevent unexpected breakdowns. It’s always better to catch issues early before they leave you stranded. So, next time you’re gearing up for a road trip, give your alternator a quick check. It might save you from a roadside hassle.
Inspecting Alternator Connections
Inspecting alternator connections involves checking for loose or corroded wires. Ensure tight and clean connections for reliable power flow. Proper inspection helps in diagnosing charging system issues effectively.
Inspecting your car’s alternator connections is crucial for ensuring it operates smoothly. If you’ve ever wondered why your car’s battery light flickers, or why the headlights dim, the culprit could be poor alternator connections. Knowing how to inspect and maintain these connections can prevent unexpected breakdowns and prolong your vehicle’s life. ###Checking Wiring And Cables
Begin your inspection by examining the wiring and cables connected to the alternator. Look for signs of wear and tear such as cracks, fraying, or corrosion. A minor issue here can escalate quickly, leading to costly repairs. Use a flashlight to get a clear view. Sometimes, debris or dirt can mask potential problems. Make sure the cables are firmly attached to their terminals and free from obstruction. ###Ensuring Secure Connections
Once you’ve checked the wiring, ensure all connections are tight and secure. Loose connections can lead to poor alternator performance. Use a wrench to gently tighten any loose bolts or nuts. But be cautious—overtightening can cause damage. Have you ever tried opening a jar only to find the lid impossible to budge? That’s what overtightening feels like for your car’s components. Do you feel confident that your alternator connections are in top shape? Regular checks can save you from unexpected roadside emergencies. By taking action now, you’re investing in your car’s reliability and safety.Troubleshooting Common Issues
Testing an alternator can feel like a daunting task, but troubleshooting common issues often reveals simple solutions. You might find it surprising how many problems can be traced back to a few key areas. By focusing on identifying faulty components and addressing wiring problems, you can save time and money, getting your car back on the road faster.
Identifying Faulty Components
Start by checking the alternator belt. Is it too loose or showing signs of wear? A worn belt can prevent the alternator from charging the battery effectively.
If the belt looks fine, consider the alternator’s bearings and brushes. These small parts might seem insignificant, but they play a crucial role. A friend once spent hours on other diagnostics only to find worn brushes were the culprit. A simple replacement solved his charging issues.
Don’t overlook the voltage regulator. This component controls the alternator’s output. A malfunction here can cause overcharging or undercharging, leading to battery issues.
Addressing Wiring Problems
Wiring problems are often overlooked but can lead to significant alternator issues. Start by examining the connections. Are they secure and free from corrosion? Corroded connections can disrupt the current flow.
Consider the condition of the wires themselves. Are there visible signs of damage, like cracks or fraying? Damaged wires can cause intermittent charging problems, making diagnosis tricky.
Think about how you can prevent future wiring issues. Regular checks and maintenance can keep your alternator functioning optimally. What steps will you take to ensure your car’s wiring remains intact?
Whether you’re a seasoned car enthusiast or someone who only pops the hood when there’s a problem, understanding these common issues can empower you to tackle alternator troubles head-on. What’s the most unexpected issue you’ve encountered while troubleshooting your car? Share your experience in the comments!
Credit: www.youtube.com
Alternator Replacement Options
Testing an alternator involves checking the voltage with a multimeter. Ensure the car is off and connect the multimeter to the battery terminals. Start the car and observe the voltage. A healthy alternator should show between 13. 8 to 14.
2 volts.
When your car’s alternator gives up, you’re left with a few replacement options. Understanding these choices can save you time, money, and a lot of frustration. Whether you decide on a new alternator or a rebuilt one, and whether you opt for professional installation or tackle the job yourself, each decision has its pros and cons. Let’s dive into these options to help you make an informed choice.Choosing Between New And Rebuilt
A new alternator is fresh from the factory and comes with a warranty that offers peace of mind. It’s likely to last longer, and you can be confident it hasn’t been tampered with. On the other hand, a rebuilt alternator is typically more budget-friendly. Rebuilt units have been refurbished, which means worn-out parts have been replaced, but they might not last as long as new ones. Consider your budget and how long you plan to keep your car. If you’re planning to drive your car for several more years, a new alternator might be worth the investment. If you’re looking for a short-term solution, a rebuilt option could suffice.Professional Installation Vs. Diy
Opting for professional installation ensures that the job is done correctly. Mechanics have the right tools and experience to replace your alternator efficiently, which can save you a headache. However, if you enjoy working on cars or are trying to save some cash, doing it yourself is possible. Ensure you have the necessary tools and follow a reliable guide or video tutorial. Think about your confidence level with car repairs. Have you tackled similar tasks before? If not, consider starting with something smaller to build your skills. Remember the time I decided to replace an alternator myself? I underestimated the effort and ended up spending my entire weekend on it. While I learned a lot, I wished I’d asked for help or gone to a professional. In the end, it’s about balancing your budget with your confidence and time. Which option fits your situation best?Credit: www.familyhandyman.com
Frequently Asked Questions
How Do You Check If Your Alternator Is Bad?
Check your alternator by starting the engine and disconnecting the battery’s negative terminal. If the engine stalls, the alternator might be bad. Use a multimeter to test voltage; it should read around 13. 8 to 14. 4 volts. Look for dashboard warning lights and listen for unusual noises.
Can I Test My Alternator Without Removing It?
Yes, you can test your alternator without removing it. Use a multimeter to check voltage output. Ensure the car battery is fully charged and engine is running. Check for 13. 8 to 15. 3 volts at the battery terminals. This indicates the alternator is functioning properly.
How To Test Alternator By Disconnecting Battery?
Disconnecting the battery while the engine runs can damage electronics. Instead, use a multimeter to test alternator voltage. Connect the multimeter to battery terminals. A healthy alternator shows 13. 8-14. 5 volts. This method is safer and accurate for checking alternator functionality without risking vehicle components.
How To Test An Alternator With A Screwdriver?
To test an alternator with a screwdriver, place the screwdriver’s metal end near the alternator’s pulley. If the alternator is working, you should feel a magnetic pull. Ensure safety by not touching moving parts during the test.
Conclusion
Testing your car’s alternator is simple and essential. Regular checks help avoid surprises. A faulty alternator can leave you stranded. Follow the steps outlined here. You’ll spot issues early. Save on costly repairs. Basic tools and patience are all you need.
Ensure your car runs smoothly. A healthy alternator powers your vehicle efficiently. Remember, maintenance is key. Keep your car in top condition. Frequent testing keeps your vehicle reliable. Enjoy stress-free driving with a well-maintained alternator. Stay proactive with your car care.
Your vehicle will thank you.